Abstract
With the increasing need for Data Analysis in business operations, more and more option for data analysis are required. One such tool is provided by Microsoft i.e. SSRS – SQL Server Reporting Services. SSRS can be deployed by customer on its own server. One can create, publish and manage reports using SSRS.
Introduction
Through SSRS, one can create reports by connecting to SQL Server, MySql Server, XML and other DB servers too. For establishing connection with any of the specified database a ‘datasource’ needs to be created. For fetching and showing data on the reports a ‘dataset’ needs to be created. In this article I will be first creating a sample rest API project and then I will be creating a sample report project which will have an xml datasource.
Part-I – Creating a Sample Rest API project
In this sample API project, I will be using Visual Studio 2015 with it. I will be creating a sample controller having a get method for fetching a list of objects.
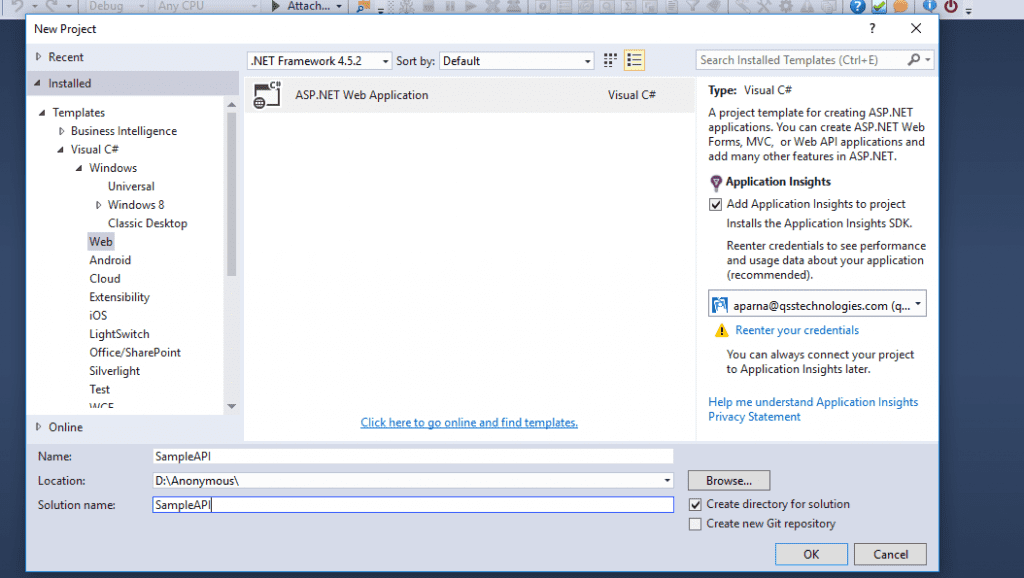
1 . Create a new project, File>New Project, This will open a dialog for new project. In this dialog, traverse C#> Web> Asp.Net Web Application and Select WEB API type of the dialog window. A Web API project will be created for you.
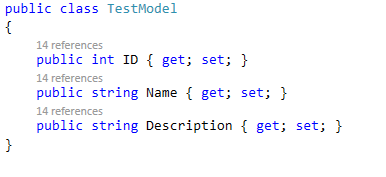
2. Create a new model class- TestModel which will have basic properties of Id, Name and Description.
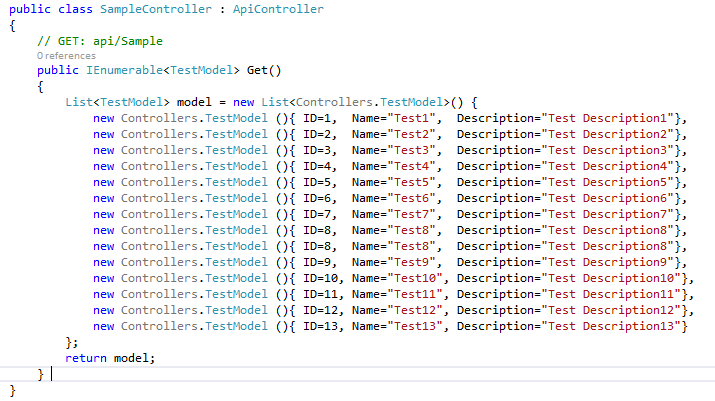
3. Add a new controller of type Web API ‘SampleController’. In this controller, I will create a get method which will return a list of TestModel objects.
4. When creating a API project for interacting with SSRS, the SSRS project accepts XML response of API, so to achieve it, I will be adding a XML formatter in Global.asax file to send XML response too as shown in the below image.
GlobalConfiguration.Configuration.Formatters.XmlFormatter.MediaTypeMappings.Add(new QueryStringMapping("type", "xml", new MediaTypeHeaderValue("application/xml")));
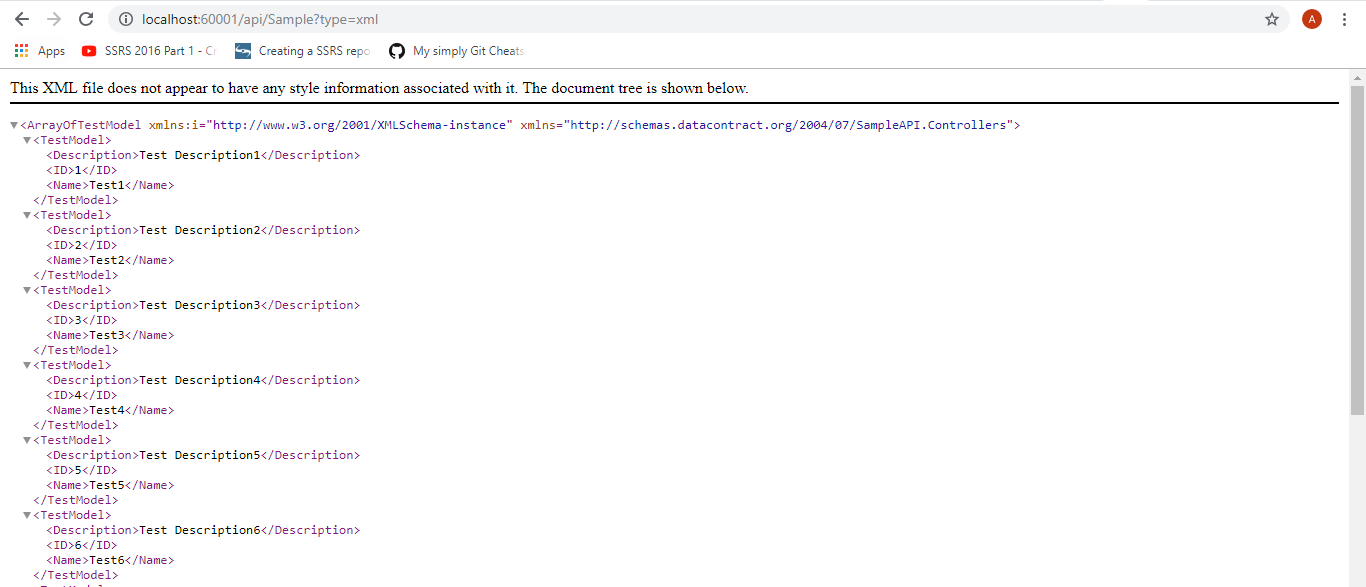
5. In this last step I will run the Web API project and hit the url (i.e.
http://localhost:60001/api/sample?type=xml) in the browser with response type of xml to get the data.
Part-II – Creating a Sample Report Project
In this article I will start after Installing and Setting up SSRS, you can get steps to install and setup SSRS on following links
https://kb.amicusattorney.com/articles/979-Installing-Reporting-Services-for-an-Existing-Instance
https://www.tutorialgateway.org/sql-server-reporting-services-configuration-manager/
In this sample Report project, firstly I need to install SSRS reporting services to SQL Server to support SSRS report. Then, with it, I want to create reports in visual studio 2015 and for that I will be updating my Visual studio to support Business Intelligence Template.
1. Create a new project, File>New Project then a dialog for new project will open, In this dialog, traverse Business Intelligence> Reporting Services > Report Server Project. A Report project will be created for you as shown in image (Image 1.a.). Once the project has been created your screen will have a Solution Explorer (project folder and file structure), Report Data (All the reports elements like DataSource, DataSet, Parameter, Fields and Images), Report Design (adding tablix and parameters to reports) and Preview Tab (it shows the actual output of report) as shown in image (Image 1.b.).
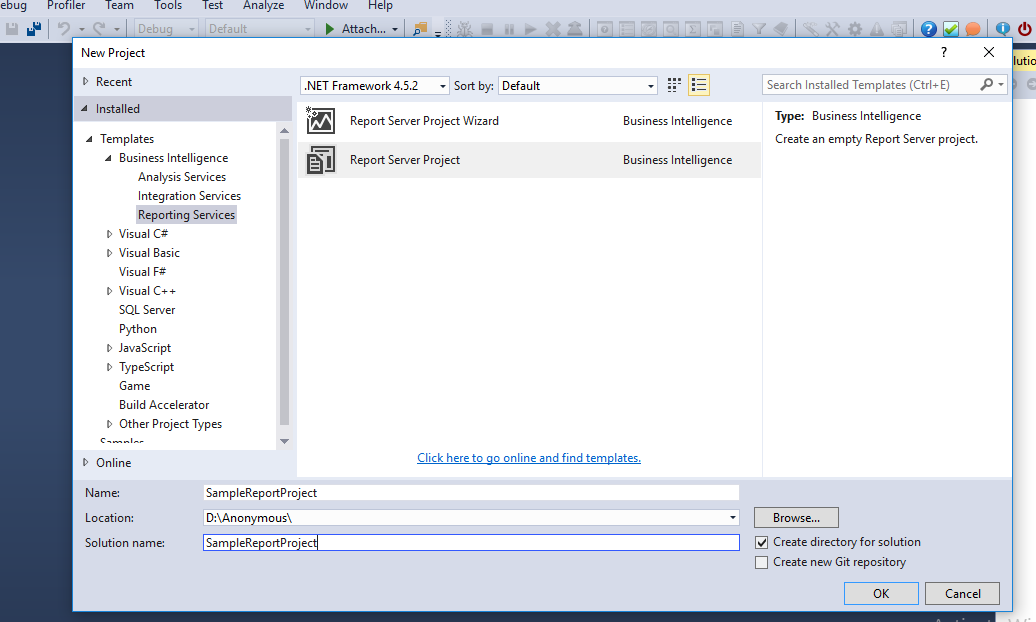
Image-1.a.
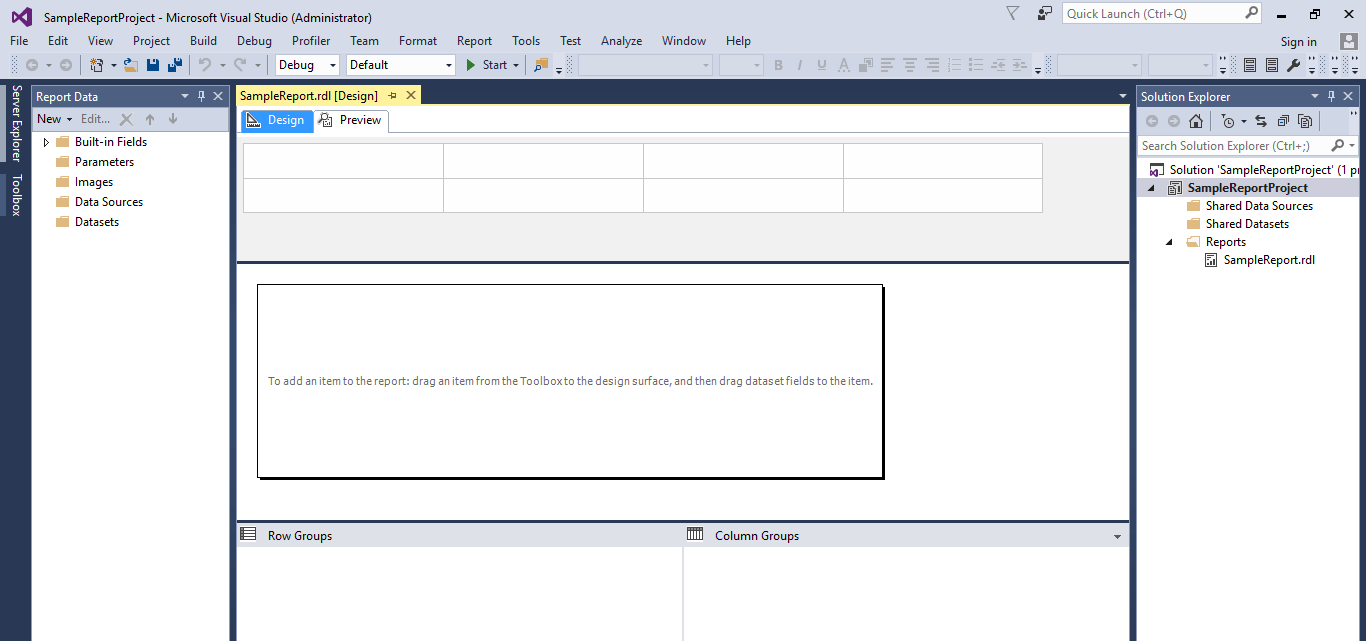
Image 1.b.
2. In step 2, I will be adding a embedded DataSource named ‘APIDataSource’ to connect to the rest APIs created in the first part of this article as shown in image (Image 2.a.). I will click on ‘fx’ create a connection string to connect to the Web API project as shown in the image (Image 2.b.).
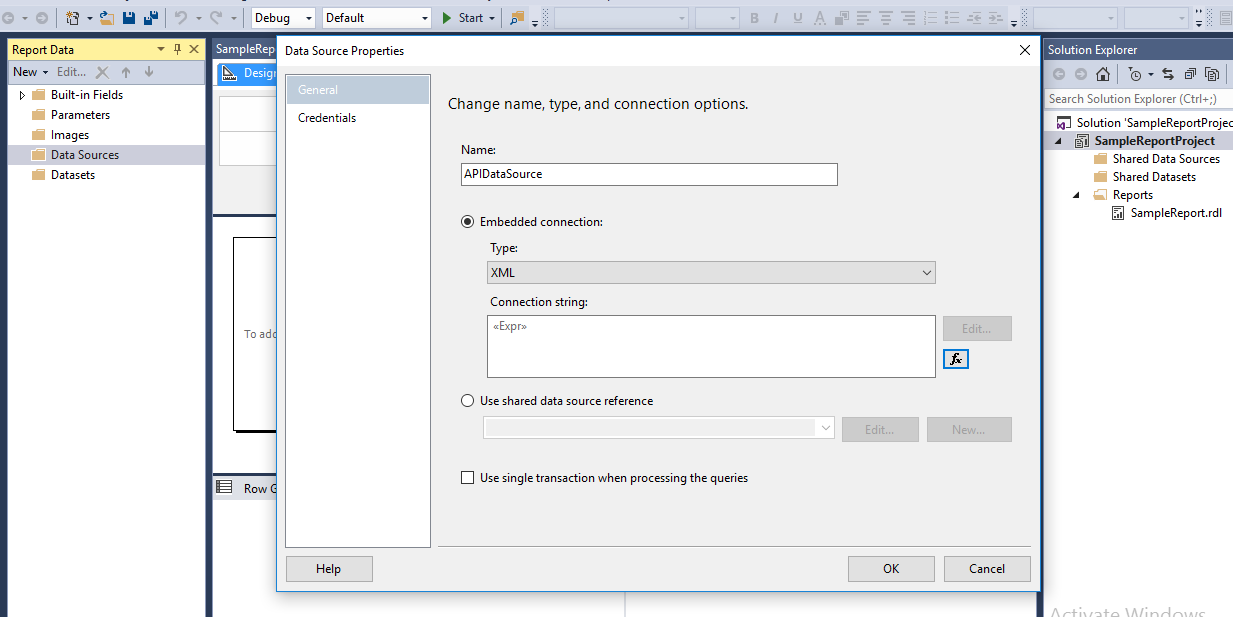 Image 2.a.

Image 2.b.
3. In step 3, I will be creating a dataset to store the fetch data from the API. For this, I will be providing, dataset name, embedded datasource as shown in image (Image 3.a. ) and adding field queries as shown in image (Image 3.b.). Click on ‘Ok’ to apply the changes. Image 3.c shows the Field queries added to the dataset.
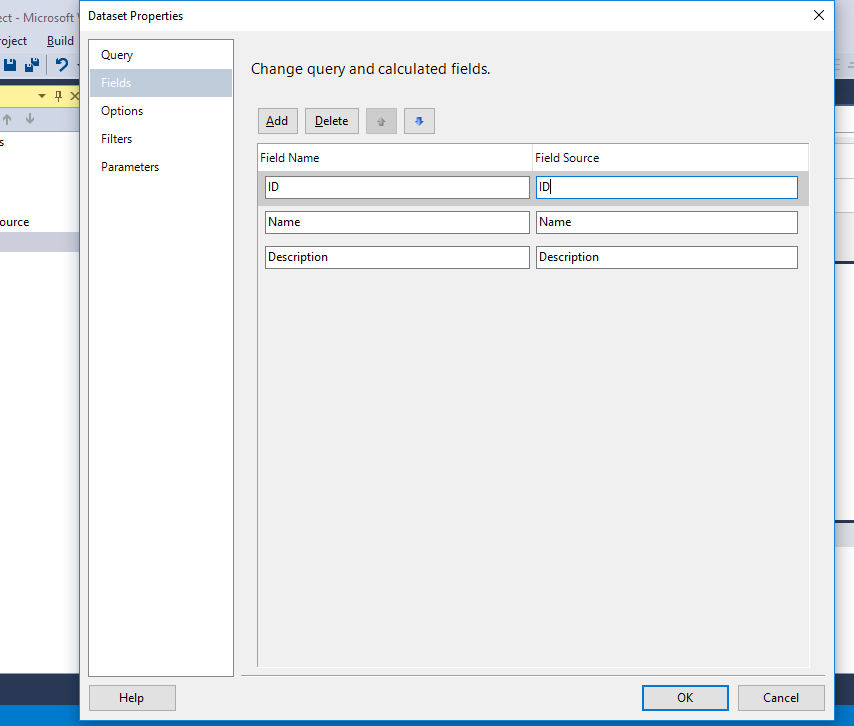
Image 3.a.
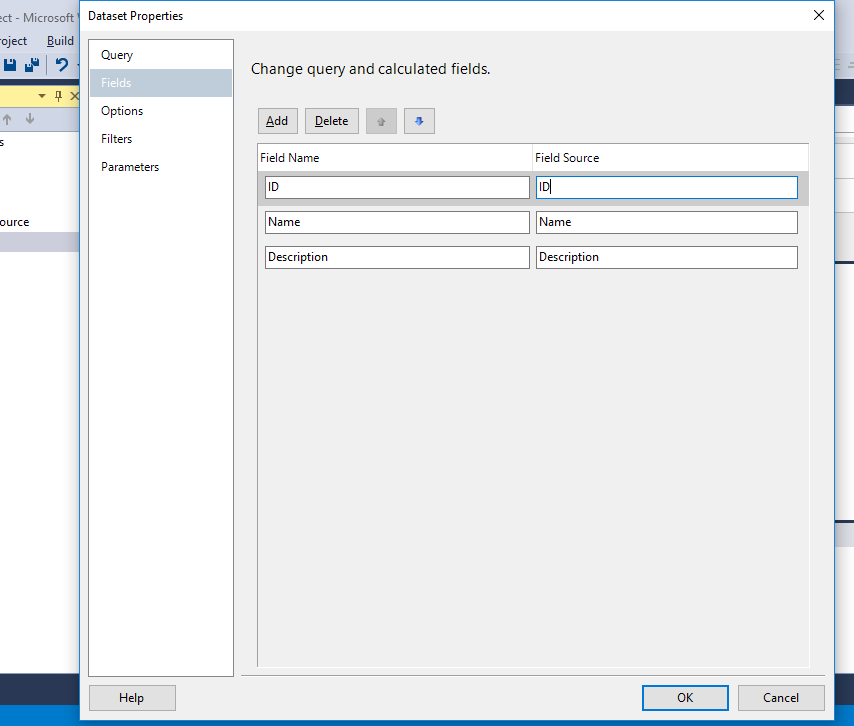
Image 3.b.
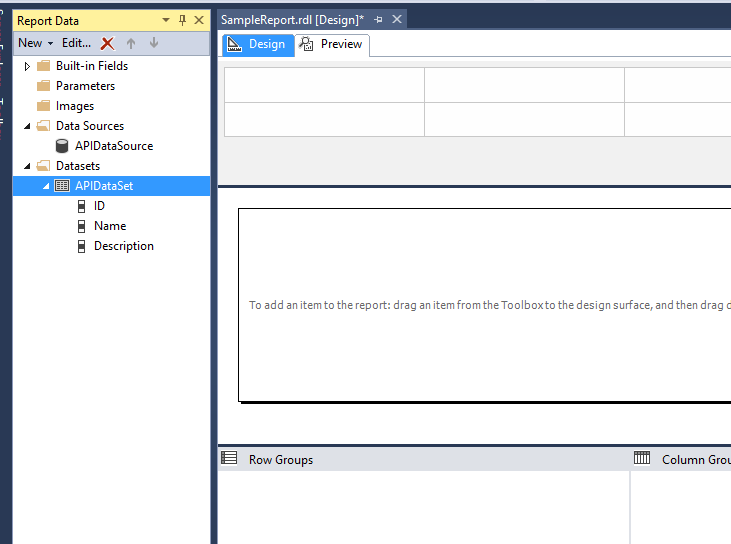
Image 3.c.
4. In step 4 , I will be designing the report UI. First, I will be adding a Header to the report which will have report name and date. Then, I will be adding a Table to show data fetched from Rest API. I will also bind the dataset and Field queries to table and its columns as shown in images below.
To add Header – Right click on report and select ‘Add Header’ as shown in image Image 4.a. Similarly you can add footer to the report.
To add Table – Right click on body and select insert and then Table as shown in image Image 4.b. Image 4.c shows mapping query fields to table.
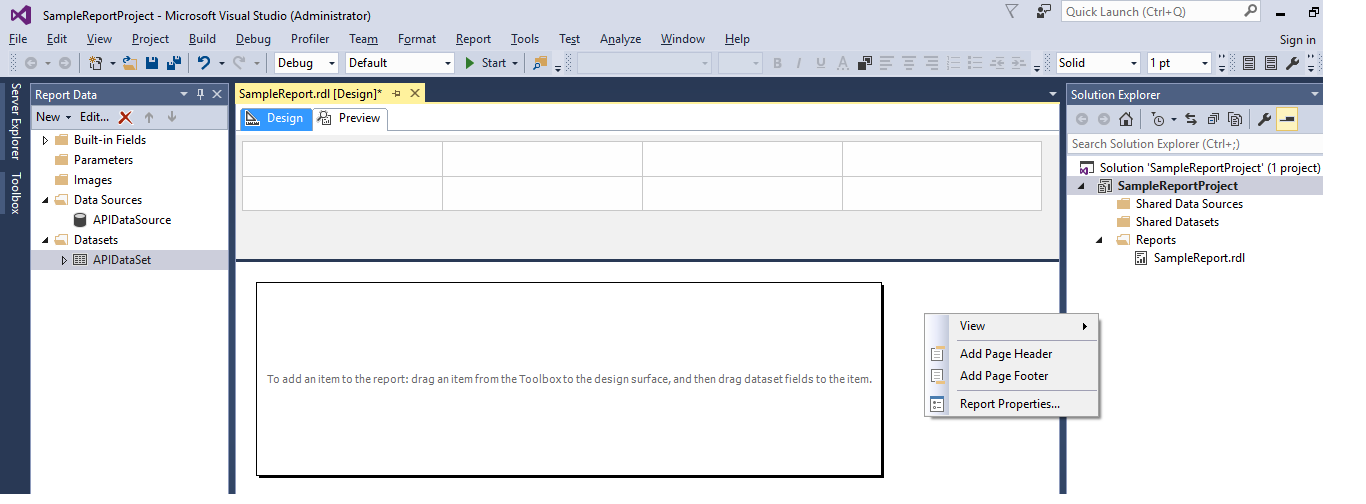
Image 4.a.
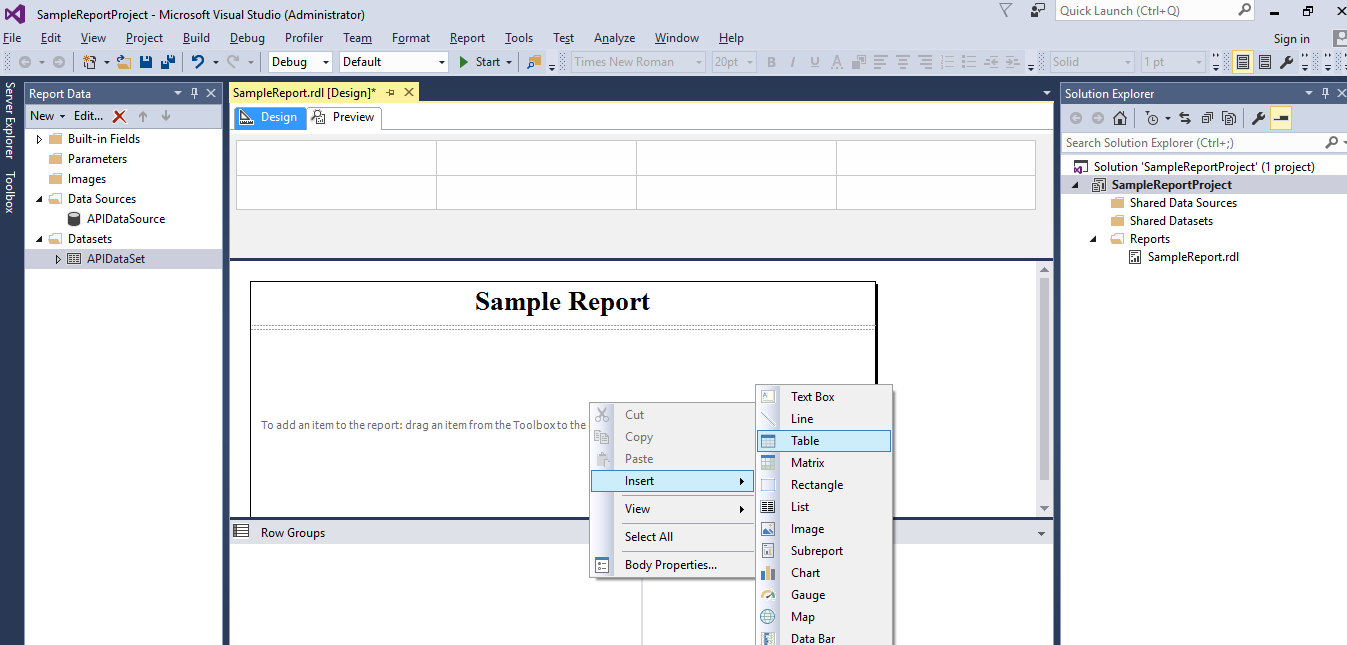
Image 4.b.
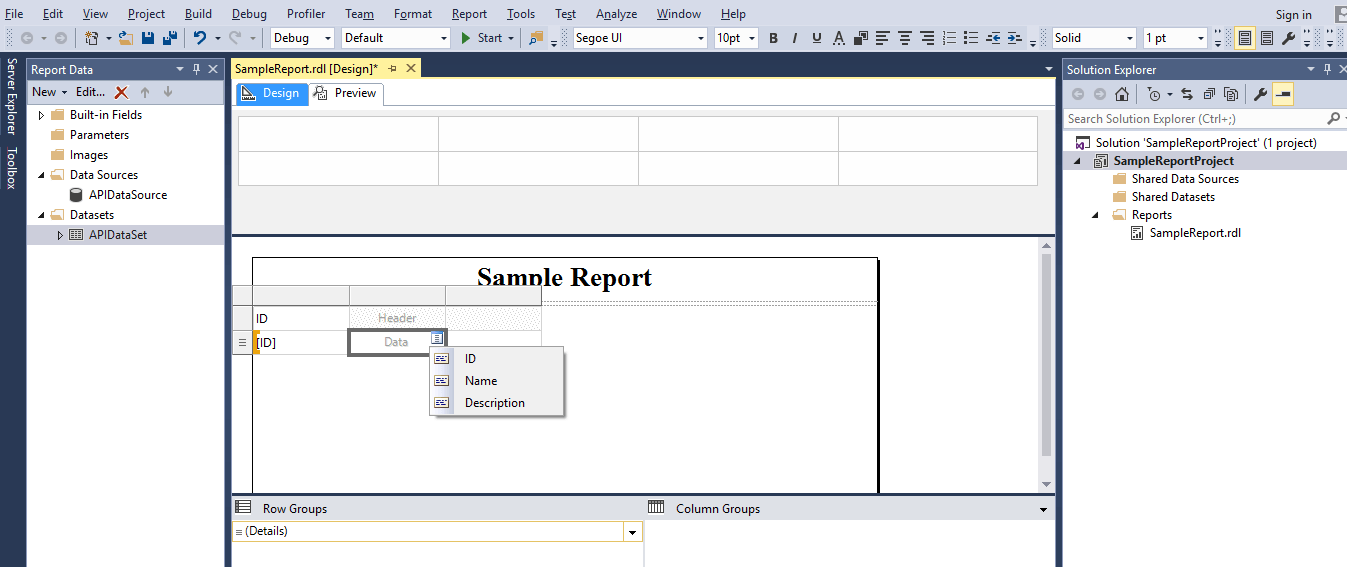
Image 4.c.
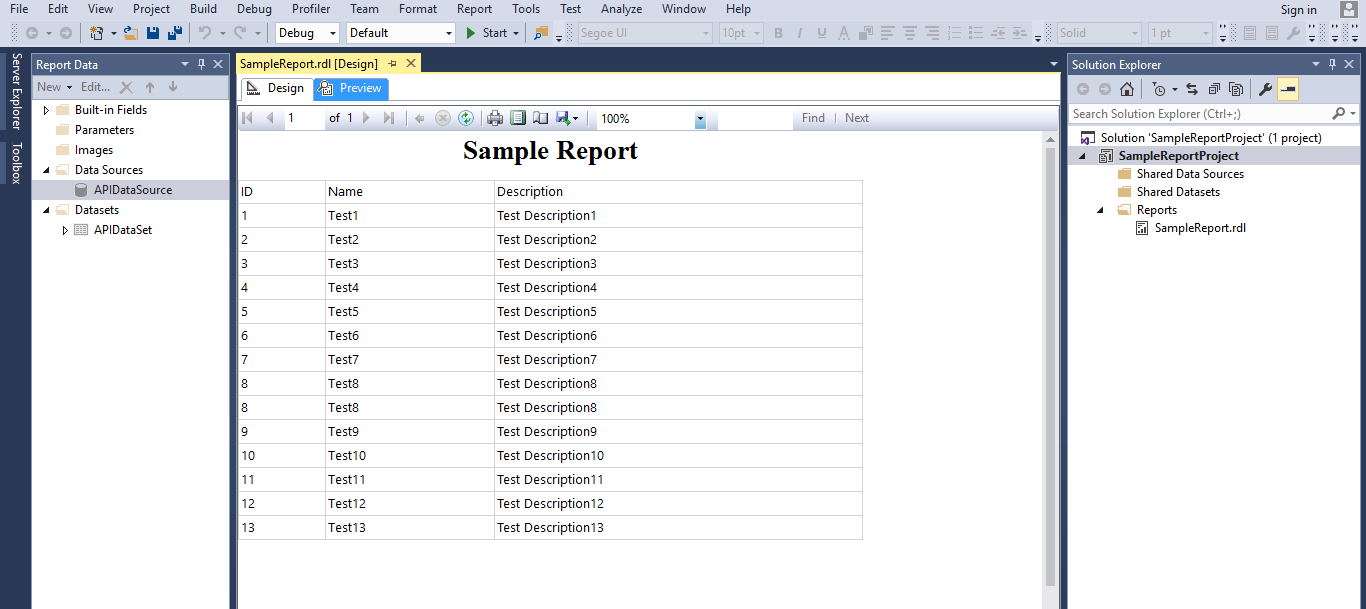
5. In step 5, I will be previewing my changes and it will show the data in table in image below.
6. This will be the final step. In this step, I will be deploying the reports on the localhost for accessing the reports
Step-1: Right click on project, and Select properties, a dialog box with project properties will open as shown in image 6.a. In Project properties, provide value for ‘TargetServerURL’ i.e. the value of Web Service URL provided in Reporting Services Configuration manager as shown in image Image 6.b.
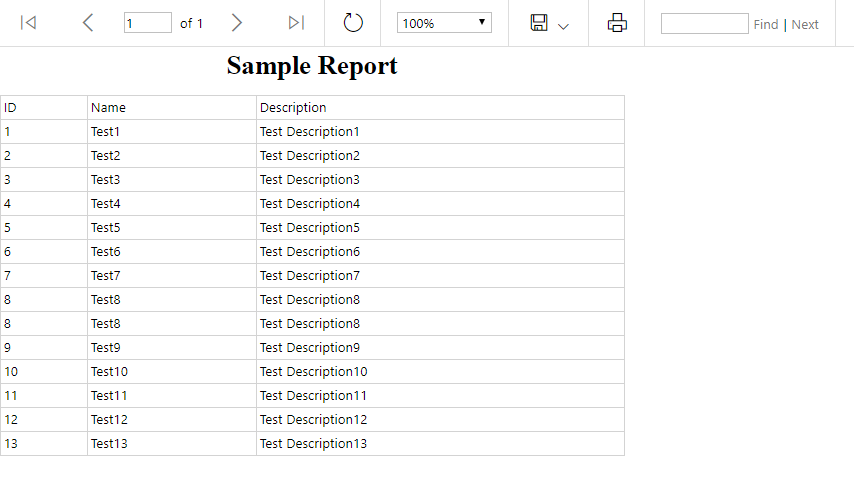
Step-2: Right click on project, and select ‘Deploy’ as shown in image 6.c. The deployment process on localhost will start. Image 6.d. Show a deployed sample report.
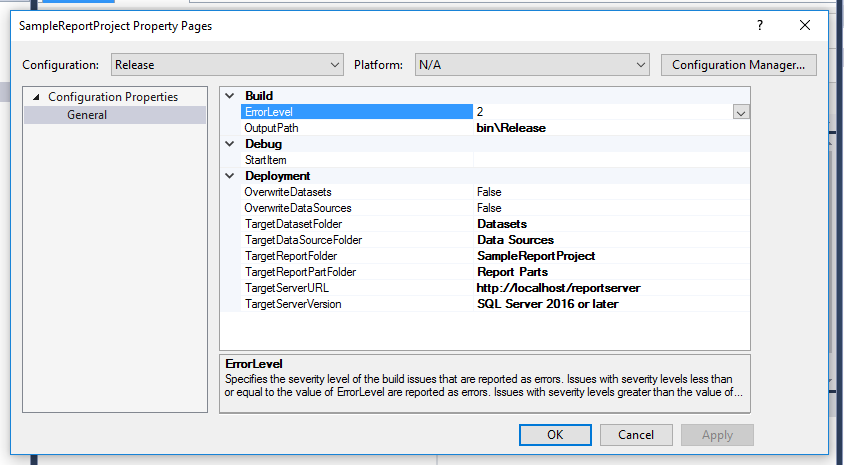
Image 6.a. 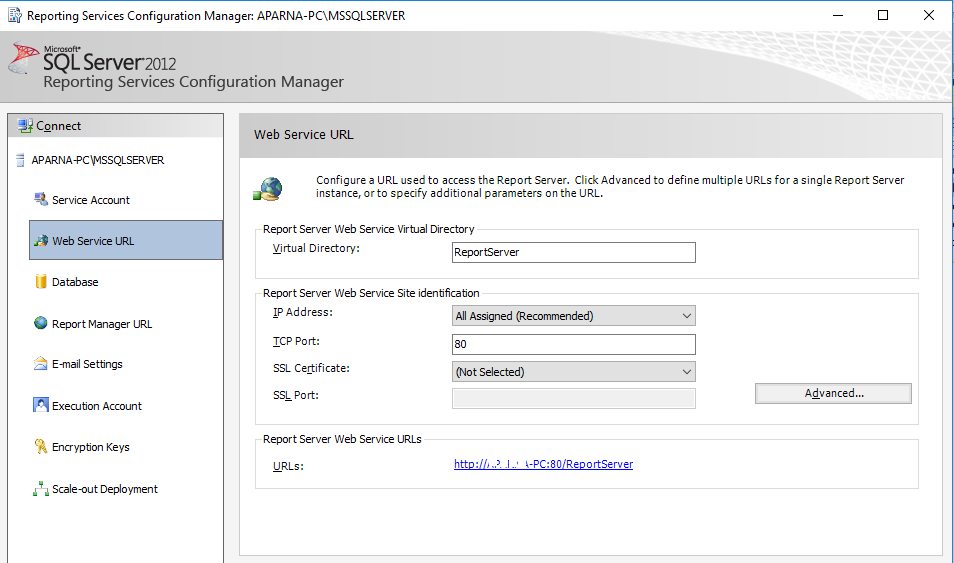
Image 6.b.
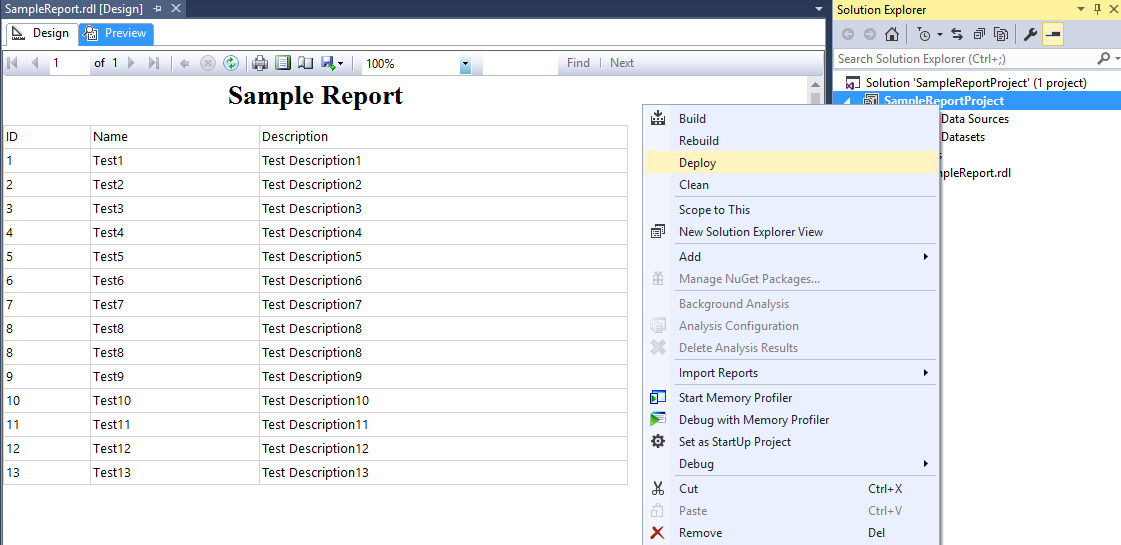
Image 6.C.
About Author:
Aparna Tomar: Sr. Software Engineer at QSS Technosoft having an experience of 4+ years. A FullStack DotNet Developer, interested to learn the latest trends in the Asp.Net and ready to initiate challenging tasks.
About QSS:
QSS is a leading dot net development company and has a proven track in executing .Net applications for its esteemed customers. The company has a core competency in developing and delivering Enterprise level .Net applications. The .Netcompetency has experienced and dedicated team of .Net developers.
How to Perform SSRS - Reporting With Rest APIs?