Abstract:
Redux is a pattern for managing application state. It is harder to understand. UI libraries like React having a system that managing their own state. If you think it is difficult to understand where is the state store and managing then I would prefer to learn this pattern to better understand the state management. Experiencing the complexity that Redux seeks to abstract is the best preparation for effectively applying that abstraction to your work. However, it is not designed to be the best way to write quick and minimum code. Finally Redux in a great tool to develop your project and having good control on state management in the project.
INTRODUCTION:
Redux is a predictable state container for javascript App. It is maintaining all state in root store so it can easily available to all routes with persisting previous state to the application which is running into a single container. It improves the reusability of components.
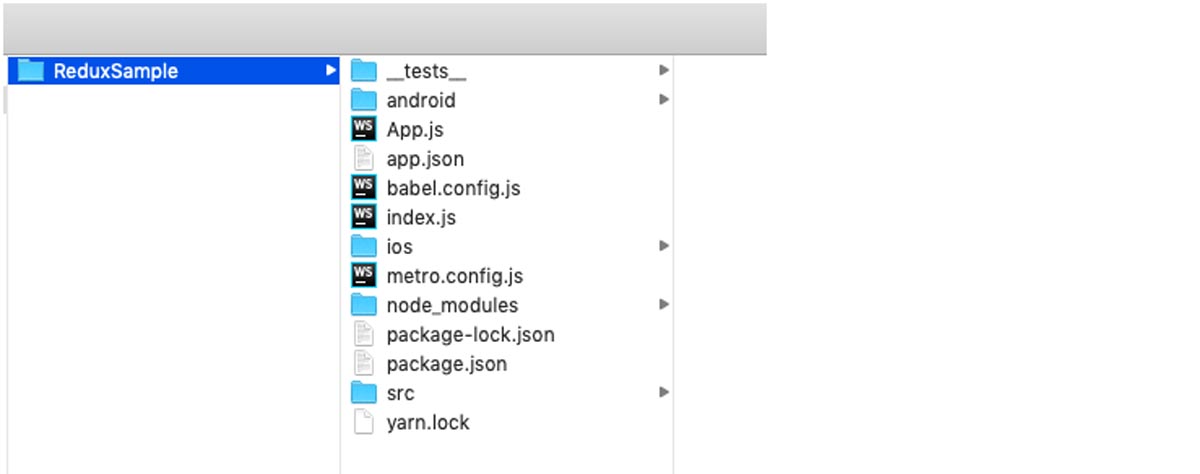
It could more understandable with a small project that I am explaining in this article. In this article, I am making a small project “ReduxSample” on React-native. This is about the handling of Activity indicator to show and hide.
Why Redux:
1. Application has consistency.
2. Reusability of components.
3. Unidirectional data flow.
4. Data stored at the top in the root store.
5. Application run in a single container.
The above mentioned benefits set the tone for using Redux with React Native and every react native app development company geared up leveraging this technology to sharpen their mobile app development profile while using React Native.
Installation and Project Setup:
react-native init ReduxSample
cd ReduxSample
Integrating Redux:
yarn add redux react-redux
# or
npm install redux react-redux –save

Index.js(entry file)
import {AppRegistry} from ‘react-native’;
import App from ‘./App’;
import React from ‘react’;
import { name as appName } from ‘./app.json’;
import { Provider } from ‘react-redux’;
import configureStore from ‘./src/store’;
const store = configureStore()
const RNRedux = () => (
<Provider store = { store }>
<App />
</Provider>
)
AppRegistry.registerComponent(appName, () => RNRedux);
Design Pattern:
1. Store:
This is defined as data at any given point in time of your application and all its structure and organization of data as “shape”, which helps to reduce the logic of reducer. States are managed at the root level in store with the help of reduces. The way to change state value inside the store needs to dispatch an action. In the given example, I am creating a store with the combination of reducer and I will discuss the latter about reducer.
import { createStore, combineReducers } from ‘redux’;
import indicationReducer from ‘./reducers/IndicationReducer’;
const rootReducer = combineReducers({
indicator: indicationReducer
});
const configureStore = () => {
return createStore(rootReducer);
}
export default configureStore;
2. Actions:
It is an indication to send data to store from the application component using store.dispatch(). It is an object which must have “type” property having a string value. It may have other properties like payload that hold data. The project what we are discussing here is to have two actions and have handled in reducer regarding each action. Once dispatch action with payload(optional value) is handled in reducer with matching action constant in switch case.
Syntext:
const action_name = “action1”;
Project Example:
export const SHOW_LOADER = ‘SHOW_LOADER’;
export const HIDE_LOADER = ‘HIDE_LOADER’;
You can keep action file separate from component for large applications and use action
creator to create action and dispatch to store.
import {action1} from ‘./actionType’;
Action creator:
Syntext:
function actionCreator(){
return {
type:action_name,// must have
payload:[] //optional property
}
}
Project Example:
import { SHOW_LOADER } from ‘./ActionsConstants’;
import { HIDE_LOADER } from ‘./ActionsConstants’;
export const showLoader = () => {
return {
type: SHOW_LOADER,
}
}
export const hideLoader = () => {
return {
type: HIDE_LOADER,
}
}
3. Reducers:
It is kind of event handler, specify to change in state on each action dispatch from any component. Action is defined only what is happening but it defined to react on over it and update store. A single object store states of application. Action dispatch by the component is handle inside reducers. There is action type and according to that action type there is reducer in whole.
import { SHOW_LOADER } from ‘../actions/ActionsConstants’;
import { HIDE_LOADER } from ‘../actions/ActionsConstants’;
const initialState = {
isLoaderShowing:false
};
const indicationReducer = (state = initialState, action) => {
switch(action.type) {
case SHOW_LOADER:
return{
…state,
isLoaderShowing: true
};
case HIDE_LOADER:
return{
…state,
isLoaderShowing: false
};
default:
return state;
}
}
export default indicationReducer;
4. Components:
It is a class basically used to designed interface either you are developing mobile apps or web applications. It is having their own life cycle on change state and props. React-Native provides many inbuilt components. It is difficult to manage screens in one single component so we break it into small components. This is a good practice to break it so that could be reused, where you want.
The example given below is based on Redux pattern. “mapStateToProps” and “mapDispatchToProps” are two important functions which are used to map state and dispatch action for reducers.
mapStateToProps:
It is a function holding all state inside it. Developers access state from store according to their need, like I am using indicator state object from store and map it to isLoaderShowing as props to the component. It is available to component with this.props.isLoaderShowing. It can map multiple states from store as your project needs.
mapDispatchToProps:
It is a function that maps actions to dispatch to reduction. Developers can map multiple actions to dispatch to reducers as their need. It returns a group of function, which is available as props inside component. In the given example, two actions dispatch maps as show and hide to component which is available as this.props.show() and this.props.hide().
import React, { Component } from ‘react’;
import { StyleSheet, View, ActivityIndicator, TouchableOpacity, Text } from ‘react-native’;
import { connect } from ‘react-redux’;
import { hideLoader, showLoader } from ‘./src/actions/Indicator’;
class App extends Component {
showHideLoader = () => {
if(!this.props.isLoaderShowing){
this.props.show();
}
else {
this.props.hide();
}
}
render() {
let color = this.props.isLoaderShowing ? ‘red’:’blue’;
return (
<View style={ styles.container }>
<View >
<View style={{flex:1, justifyContent:’center’, alignItems:’center’}}>
<View style={{paddingVertical:60}}>
{ this.props.isLoaderShowing && <ActivityIndicator size={“large”} color={‘red’}/>}
</View>
<TouchableOpacity onPress={this.showHideLoader.bind()}
style={{
paddingVertical:15,
paddingHorizontal:50,
borderColor:color,
borderWidth:1,
borderRadius:5,
backgroundColor: color
}}
>
<Text style={{color:’#fff’, fontSize:17, fontWeight: ‘bold’}}>{this.props.isLoaderShowing ? “Hide Loader” : “Show Loader”}</Text>
</TouchableOpacity>
</View>
</View>
</View>
);
}
}
const styles = StyleSheet.create({
container: {
paddingTop: 30,
justifyContent: ‘flex-start’,
alignItems: ‘center’,
}
});
const mapStateToProps = state => {
return {
isLoaderShowing:state.indicator.isLoaderShowing,
}
}
const mapDispatchToProps = dispatch => {
return {
show: () => {
dispatch(showLoader())
},
hide: () => {
dispatch(hideLoader())
}
}
}
export default connect(mapStateToProps, mapDispatchToProps)(App)
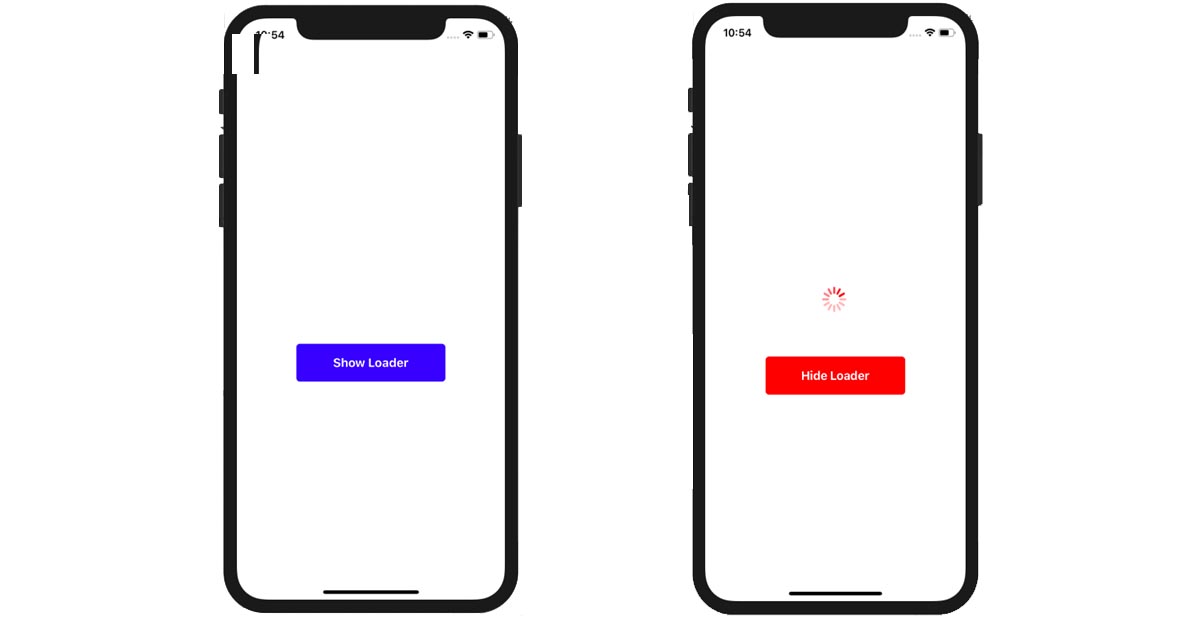
Screenshots given below are the output of the sample project discussed above. While running this project, it will initially show a screen, having ShowLoader button. On clicking it, a loader indication show and button text changed to HideLoader. It is changing the state of activity indicator on click action on each button.

The cross-platform mobile application development companies are opting to react native application development services as one of the most preferred technology using the strength of predictable state containers like Redux, Mobx etc.
About Author:
 Manoj Kumar Sharma , Team Lead in QSS Technosoft Pvt. Ltd. I am having 3+ year experience in web development using javascript/PHP and 1.5 year experience in cross platform mobile apps development using React Native.
About QSS:
QSS Technosoft is a leading company and has a proven track executing React Native based cross-platform mobile applications for its esteemed customers. The company has a core competency in developing and delivering Enterprise level React Native applications both in on Native and Hybrid platforms. The React Native competency has experienced and dedicated team of React Native developers.


