Abstract:
Your life makes so much easier, when you feel that you get to discover something new. It is the same with the design as well. Design is always a conversational topic with other professionals. It varies between different projects and design fields.
For every design tool, there are many heated discussions about which one is the best. So, as much as, we would like, there is no one perfect tool to rule them all. I believe in the power of using different tools together in a workflow that fits your needs.
Introduction:
Invision is a prototyping tool created for designers, by designers. It allows you to create clickable versions of your design, and easily create interactive mockups for your designs.
When you’re ready, you can share these mockups with your team or clients. It makes presenting your designs as a breeze and is much more effective than sending out a .PDF or screenshots. It’s great for getting feedback from the team via comments.
Here are my top 7 reasons for using Invision:
1. Good PresentationControl Design
2. Real-Time To-Do lists
3. Use on Mobile as well
4. Syncing History and Version
5. Hover States
6. Share Live Projects
Step by Step Process:
Invision allows you to quickly create interactive clickable prototypes and gather instant feedback from your users/stakeholders.
To get started, you must create your mockups/wireframes in another design tool, like Studio (available with numerous plans, including our Free plan), Sketch, or Photoshop.
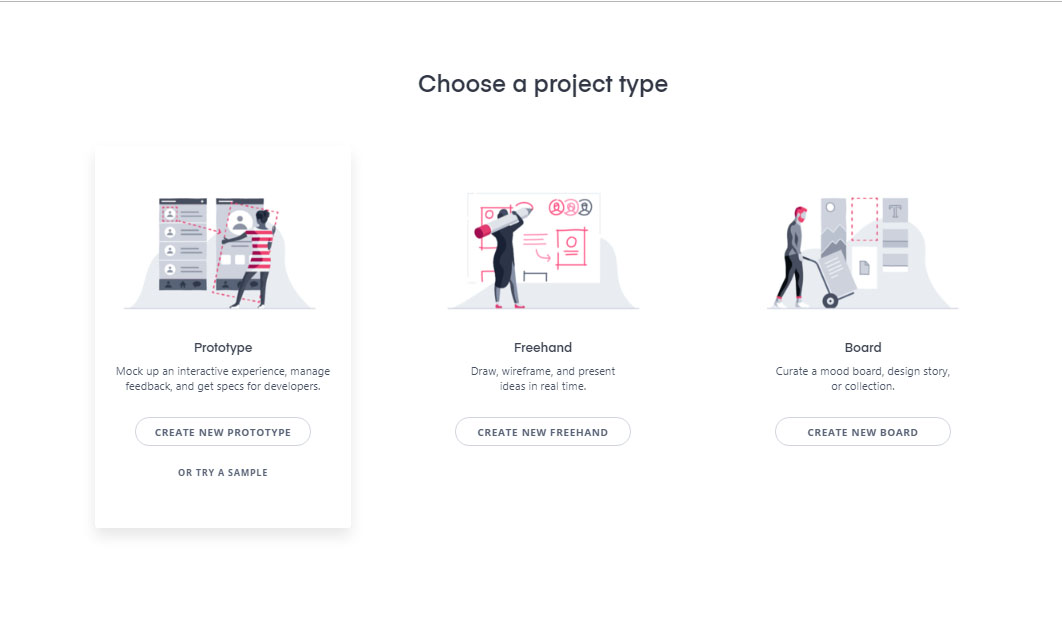
1. Sign in to your account and click the + button on the right. Choose your project type (prototype or board), name it, and specify the layout.
Alternatively, you can view a sample prototype or board by hovering over that type and clicking Or Try a Sample.
2. Click Next.
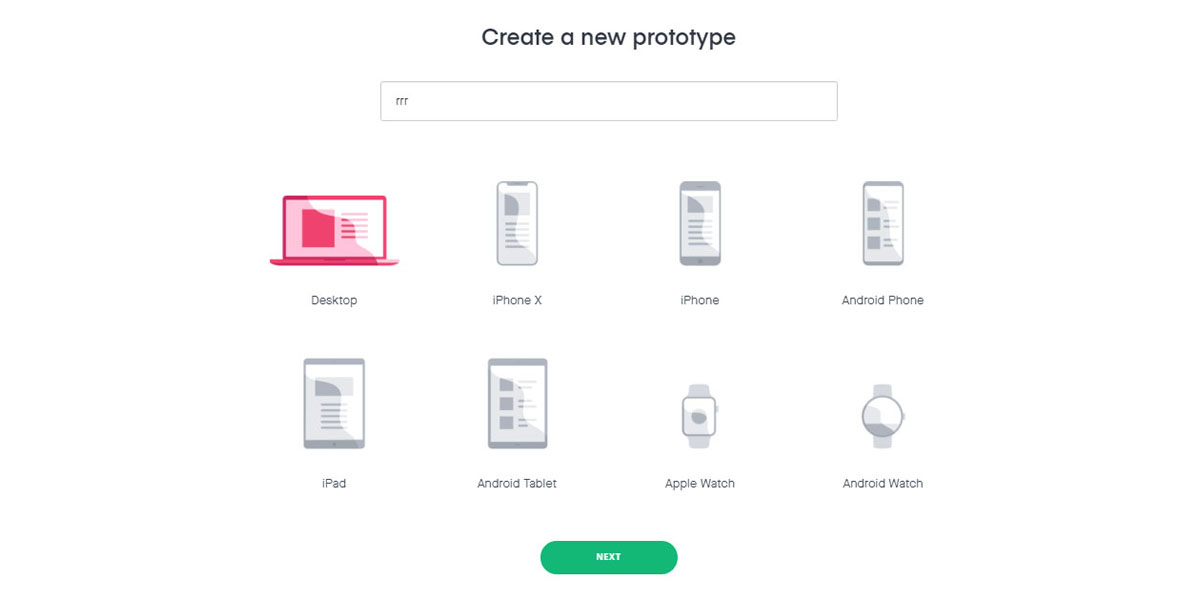
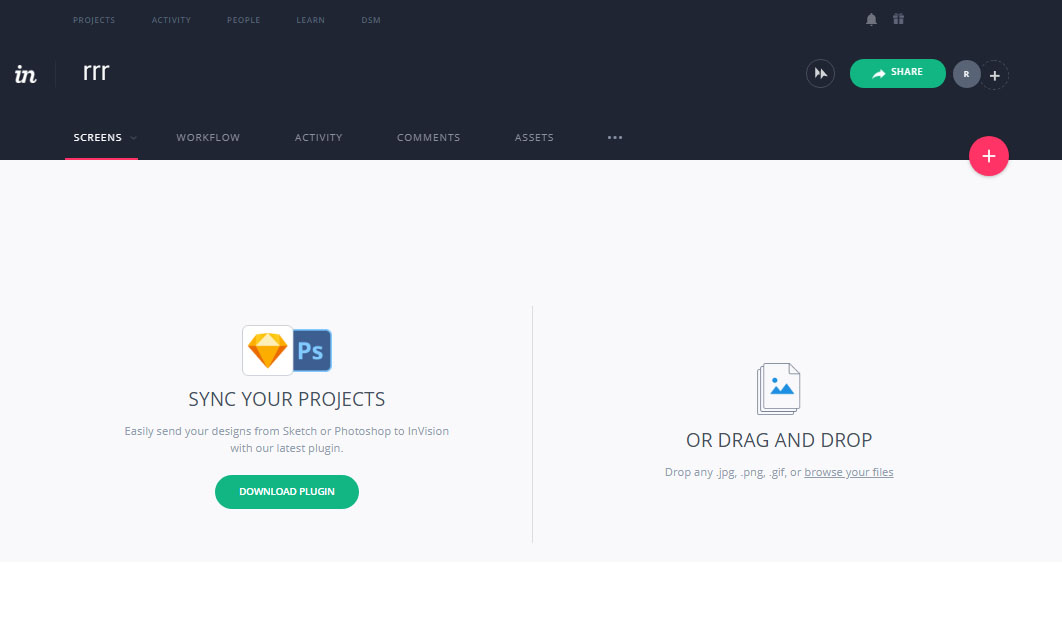
3. Upload or Drag and drop your pre-created screens/wireframes/mockups and add hotspots to create the user flow of your prototype.
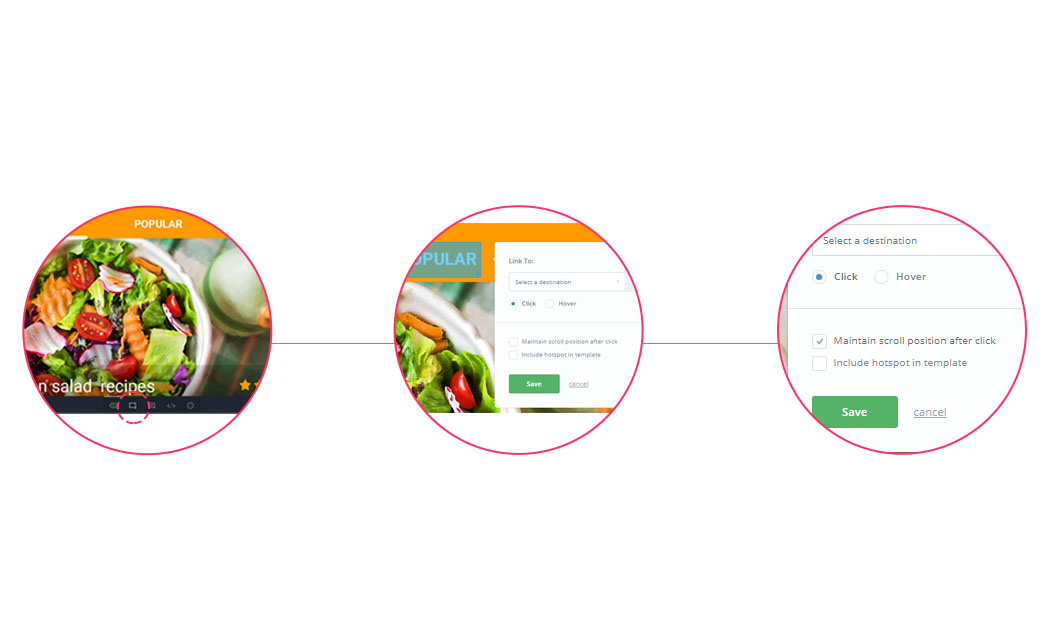
At the bottom of the page, click the Build mode icon.
Click and drag around the desired hotspot area.
In the hotspot pop-up modal, select the following options:
Link To: Set the destination screen the hotspot will link to.
Click/Hover: Determine whether clicking or hovering will trigger the hotspot. Hover is not available for mobile Prototypes.
Maintain scroll position after click: Check this box if you don’t want the scroll position to reset after clicking the hotspot.
Include hotspot in template: Check this box to duplicate a hotspot across multiple screens.
Click Save.

You can also use Hotspot Link by creating a hotspot once and using it across multiple screens. This is helpful if you have multiple screens that share common links.
BACKGROUND COLOR
To create a background color for desktop prototypes pull the bottom corner pixels of the screen and try to match them. If you want to change the background, you can set a different color or upload an Image.
To change the background color of a desktop prototype:
1. Open your prototype and navigate to the desired screen.
2. At the bottom right of the page, click the configuration icon
3. In the pop-up modal under Background, you can change the color by entering a new hex code.
4. Alternatively, you can upload an image by clicking Upload New.
5. If desired, check the box Apply to all current and future screens.
Click Save.

FIXED HEADERS AND FOOTERS
you can set fixed headers and footers, adding a level of realism to your prototype.
DESKTOP
To set a fixed header or footer on a desktop prototype:
1. Open your prototype and navigate to the desired screen.
2. At the bottom of the page, click the Build mode icon.
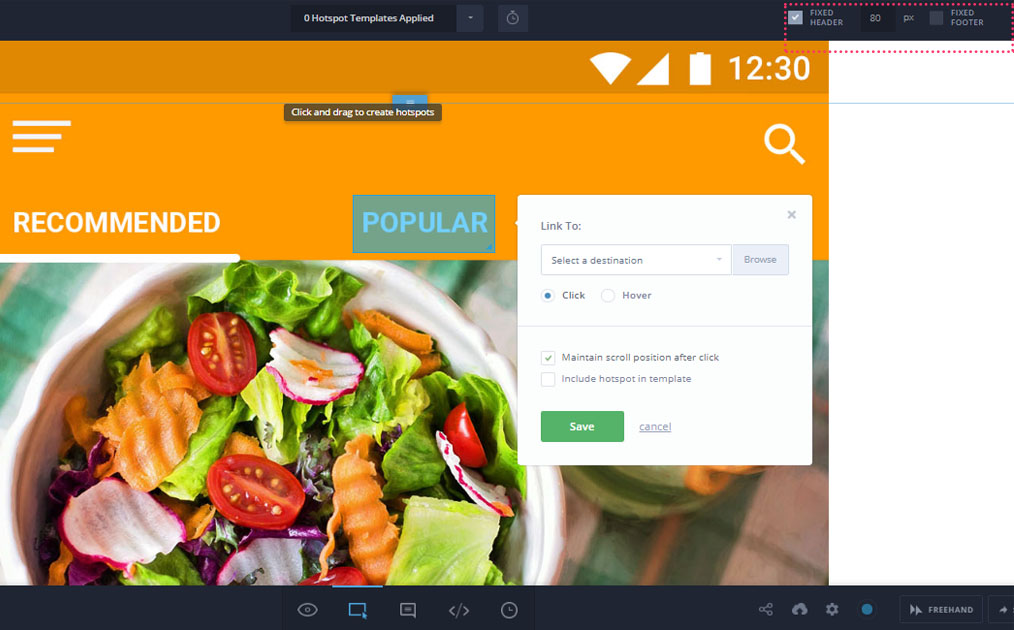
3. At the top right of the page, check the box for Fixed Header or Fixed Footer.
4. Depending on your selection, a slider will appear at the top or bottom of the screen. To adjust the header or footer size, click and drag the slider. After you’ve set the header or footer, click the Preview mode iconto see it in action.
5. Click Save.
OVERLAYS
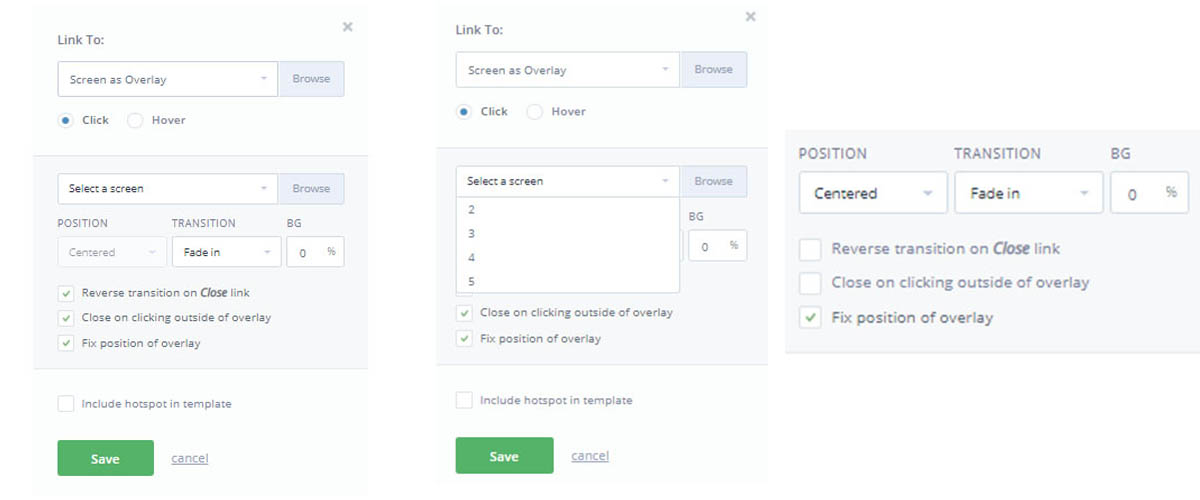
To create an overlay:
1. Open your prototype and navigate to the desired screen.
2. At the bottom of the page, click the Build mode icon.
3. Create a hotspot and, from the Link to drop-down, select Screen as Overlay.
4. If working on a desktop prototype, choose Click or Hover.
If you choose Hover, an option will appear to Stay on target screen.
5. Click the Select a Screen drop-down.
6. To choose your overlay’s location, click the Position drop-down. If applicable, use the input boxes to define the distance from the edges.
7. To animate the overlay, click the Transition drop-down.
8. To set the opacity of the background layer, Click the BG field and enter a percent value. You can also click and drag the slider to adjust the opacity.
9. If desired, check the box Include hotspot in the template.
10. Click Save.
Hope this blog will help you to understand the most amazing prototyping tool ‘INVISION’.
But, in case you encounter any challenges, feel free to contact our UI/UX Design Experts.
About Author:
 Ramandeep Kaur is a full time designer with 6+ years of experience in User Interface and User Experience. She has successfully delivered 100+ projects (Mobile Apps / Desktop Apps / Responsive Websites) to client across the Globe.
About QSS:
QSS Technosoft has a proven track executing enterprise level applications incorporating best of UI/UX both for web and mobile. The company has a core competency in developing and delivering projects having rich look designs with high usability. The UI/UX competency has experienced and dedicated team of UI/UX engineers.

